Once you have installed Exchange Server 2003 on a
Windows Server 2003 cluster, there are additional administrative tasks
to perform in order to create the Exchange Server 2003 virtual server.
Even after you have set up the Exchange Server 2003 virtual server, you
can manage details about the cluster and the services that run on it.
Some of the settings include how long a service will be unresponsive
before restarting, the time-frame after which to allow a failover, and
whether to allow automatic or manual failback.
Creating an Exchange Server 2003 Virtual Server
The
final step in configuring Exchange Server 2003 to run on a Windows
Server 2003 cluster is to create the Exchange Server 2003 virtual
servers. The number of Exchange Server 2003 virtual servers you need to
create depends on whether you are creating an active/passive or an
active/active cluster. If you are setting up a two-node active/passive
Exchange Server 2003 cluster, you will be setting up one Exchange
Server 2003 virtual server. If you are setting up a two-node
active/active Exchange Server 2003 cluster, you will set up two
Exchange Server 2003 virtual servers, since both server nodes will be
active. You must repeat this step for each active node that will run an
Exchange Server 2003 virtual server. In the practice at the end of this
lesson, you will create an Exchange Server 2003 virtual server on
Server01.
Each
Exchange Server 2003 virtual server consists of a static IP address, a
unique network name, a shared physical disk, and an Exchange System
Attendant resource. You create each resource individually, in turn, in
Cluster Administrator. Using Cluster Administrator, first you create
the network and disk resources, and then you create the Exchange System
Attendant resource. After you successfully create the Exchange System
Attendant resource, Exchange System Attendant automatically creates all
the other resources for the Exchange Server 2003 virtual server. The
Exchange System Attendant resource creates the following resources,
which are shown in the Cluster Administrator window in Figure 1:
Exchange Message Transfer Agent Instance
Exchange Information Store Instance
Exchange Routing Service Instance
Exchange MS Search Instance
SMTP Virtual Server Instance
Exchange HTTP Virtual Service Instance

The
Message Transfer Agent Instance resource is created only in the first
Exchange Server 2003 virtual server added to a cluster. All Exchange
Server 2003 virtual servers in the cluster share the single Message
Transfer Agent Instance resource.
Managing Exchange Server 2003 Clustered Services
After
creating the Exchange Server 2003 virtual server, there are additional
configuration options for determining how the cluster handles the
Exchange Server services. These configuration options are managed in
Cluster Administrator. In most cases, the default settings are
adequate, but should you need to change a setting, you can.
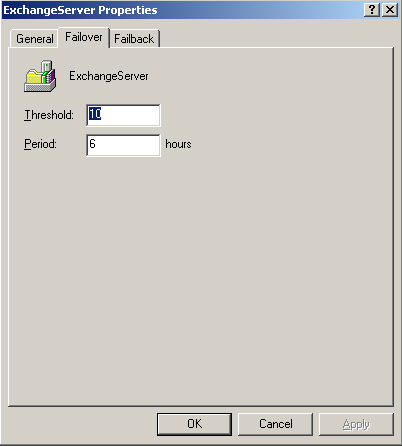
One set of settings you might configure is how the group fails over and fails back. Figures 2
and 3 show the Failover and Failback property dialog boxes for the
Exchange Server 2003 virtual server. On the Failover page, you can
configure the number of times the node is allowed to failover
(Threshold) during the period, which is defined in hours. If the node
exceeds the threshold, it is taken offline and the Cluster Service does
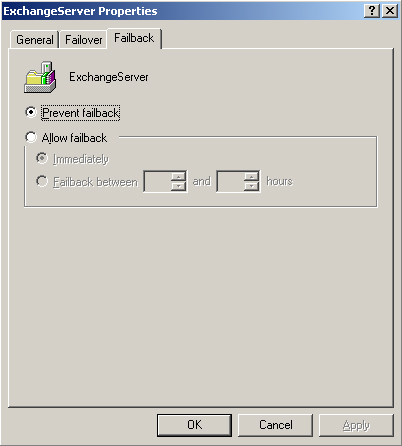
not attempt to bring the server back online. On the Failback dialog
box, you see that the default behavior is to not allow automatic
failback when the server node returns to online operation. If no
failback policy is configured, the group will run on the alternate node
until another failover situation occurs that causes the group to
failover to the original node. In order to have resources fail back,
you must configure a policy. When you configure a failback policy, you
have the option to fail back immediately or only between certain hours.
Immediate failback can be undesirable because it could occur in the
middle of the business day. During a failback, the active services are
taken offline while they are failed back to the original node, at which
point they will be brought back online. The failback process can take
up to 15 minutes, which will result in a disruption of service.
Therefore, it is generally better to configure a failback period after
business hours or during a slow time on the network. To set the time on
the policy, use the twenty-four-hour system of expressing time, with 0
being 12:00 A.M. and 23 being 11:00 P.M.
You can also right-click any of the resources listed in Cluster Administrator (such as those shown in Figure 6-6)
and click Properties to access property tabs, which allow you to
configure dependencies if you need to make changes for a resource. If
you click the Advanced tab in the properties of any resource, you will
see a dialog box like that in Figure 4.
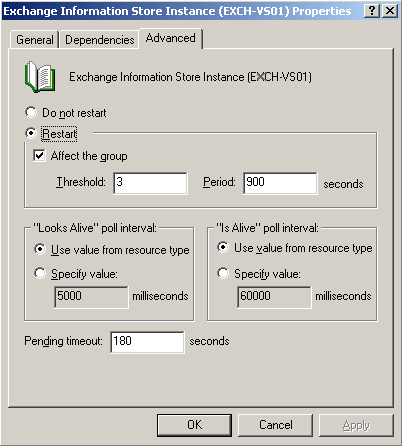
On
the Advanced tab, you configure settings for only the specific
resource. In this example, the properties of the Exchange Information
Store Instance are being edited. Here, you can define what happens if
the individual resource fails on a server node. By default, resources
will attempt to restart according to the threshold that is set. With
the Affect The Group option selected, when the resource attempts to
failover, it increments the group’s failover count by one. This group
count directly ties to the threshold set on the group’s failover
policy, as shown in Figure 2.
If you clear the box for the Affect The Group option, the resource
failing over does not increment the group failover count. When enough
resource failovers occur to cause the group count to reach its
threshold, or the individual resource threshold is reached, the entire
group fails over to another node on the cluster.
When
you first deploy a cluster, it is a best practice to test the restart,
failover, and failback policies. This allows you to ensure that they
function correctly prior to a real failure occurring. Cluster
Administrator allows you to manually initiate a failure by
right-clicking a resource and clicking Initiate Failure. You can cause
resources to restart according to their restart policy this way,
including causing the entire group to failover to another node.
Another
way to test the failover policy is by manually stopping the cluster
service on a server node. To do this, click the node you want to
failover in the Cluster Administrator console, and then click the File
menu and click Stop Cluster Service. This will cause an immediate node
failure and cause the configured failover to occur. You can then start
the service again and test the failback policy, if one is configured.
Practice: Managing an Exchange Server 2003 Cluster
In
this practice, you will create an Exchange Server 2003 virtual server
and, in the process, create the necessary IP address resource, network
name resource, disk resource, and System Attendant resource.
Exercise 1: Create an Exchange Server 2003 Virtual Server
The
first task is to create a new group for the Exchange Server 2003
resources. While you could use the existing Cluster Group set up by
Windows, it is recommended that you store application resources in
their own groups.
1. | On
the first node of the cluster, from the Start menu, point to
Administrative Tools, and then click Cluster Administrator. Right-click
the Groups container, point to New, and then click Group.
|
2. | The New Group Wizard starts. In the Name field, type ExchangeServer for the name of this Exchange Server 2003 cluster group.
|
3. | On
the Preferred Owners page, verify that there is either one or no
cluster nodes listed in the Preferred Owners box, and then click
Finish. The new Exchange Server 2003 virtual server (cluster group) is
displayed under Groups.
|
Note
If
the Preferred Owners page contains both nodes in the cluster, configure
the order of the list on the second server node as the opposite of the
list on the first node. For example, if the Preferred Owners list on
the first node lists Server01 and then Server02, configure the second
node to list Server02 and then Server01. |
Exercise 2: Create an IP Address Resource
1. | Right-click the Exchange Server 2003 virtual server, point to New, and then click Resource.
|
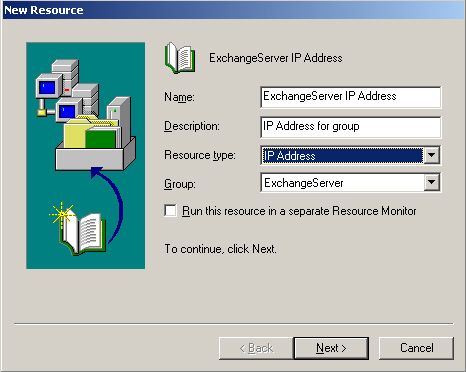
2. | The New Resource Wizard starts. On the New Resource page, type ExchangeServer IP Address.
|
3. | From
the Resource Type drop-down list, select IP Address. Verify that the
Group box contains the name of your cluster group, as shown in Figure 5, and then click Next.
|
4. | On
the Possible Owners page, verify that Server01, which has Exchange
Server 2003 installed on it, appears in the Possible Owners list, and
then click Next.
|
5. | On the Dependencies page, verify that no resources appear in the Resource Dependencies list, and then click Next.
|
6. | On
the TCP/IP Address Parameters page, in the Address box, type the static
IP address of the Exchange Server 2003 virtual server. This should be
an address that works on your public network, yet is unique to any
other already assigned to the physical server or to the cluster.
|
7. | Verify
that the subnet mask for the Exchange Server 2003 virtual server is
correct and that the LAN connection to the public network is selected,
and then click Finish.
|
Exercise 3: Create a Network Name Resource
1. | Right-click the Exchange Server 2003 virtual server, point to New, and then click Resource.
|
2. | The New Resource Wizard launches. On the New Resource page, type ExchangeServer Network Name.
|
3. | In the Resource Type list, click Network Name, and then click Next.
|
4. | On the Possible Owners page, verify that Server01 appears in the Possible Owners box, and then click Next.
|
5. | On
the Dependencies page, click the IP Address resource for this Exchange
Server 2003 virtual server in the Available Resources list, and then
click Add. Click Next.
|
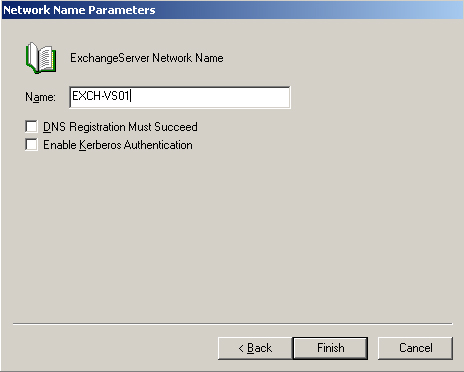
6. | On the Network Name Parameters page, shown in Figure 6, in the Name field, type a name, such as Exch-VS01
(Exchange Virtual Server 01), for the Exchange Server 2003 virtual
server. This name is the network name that identifies the Exchange
Server 2003 virtual server on your network. Click Finish when done.
|
Exercise 4: Add a Disk Resource to the Exchange Server 2003 Virtual Server
In
this exercise, you will create a new disk resource. You must create a
disk resource for each disk that you want to associate with the
Exchange Server 2003 virtual server. Disk resources must be SCSI disks
and connected through SCSI or Fibre channel. If you attempt to use an
Integrated Device Electronics (IDE) disk, you will be able to create
the resource but not to bring it online later. If the resource you want
to add already exists in another group, you can move it from the other
group. If the disk resource you want to add does not yet exist, you
must create it.
1. | Right-click the Exchange Server 2003 virtual server, point to New, and then click Resource.
|
2. | On the New Resource page, type Disk <drive letter>, where drive letter is a logical drive on the disk. For the description, use something descriptive, such as Disk F: Log Files (substitute the drive letter you use).
|
3. | In the Resource Type list, click Physical Disk, and then click Next.
|
4. | On the Possible Owners page, verify that Server01 appears in the Possible Owners list, and then click Next.
|
5. | On the Dependencies page, verify that no resources appear in the Resource Dependencies list, and then click Next.
|
6. | On
the Disk Parameters page, select the disk you want. If the disk does
not appear here, it means that either another cluster group already has
defined a resource for it or it was not successfully installed.
|
7. | Click Finish. The disk resource appears as a resource of the Exchange Server 2003 virtual server.
|
Exercise 5: Create an Exchange Server 2003 System Attendant Resource
1. | In
Cluster Administrator, right-click the Exchange Server 2003 virtual
server, and then click Bring Online. You will see each of the resources
go from Offline to Online Pending to Online.
|
2. | Right-click the Exchange Server 2003 virtual server, point to New, and then click Resource.
|
3. | On the New Resource page, in the Name field, type Exchange System Attendant - (Exch-VS01).
|
4. | In the Resource Type list, click Microsoft Exchange System Attendant, and then click Next.
|
5. | On the Possible Owners page, verify that Server01 appears in the Possible Owners list, and then click Next.
|
6. | On
the Dependencies page, select both the Network Name and Physical Disk
resources for this Exchange Server 2003 virtual server in the Available
Resources list, and then click Add. Click Next.
|
7. | On
the Data Directory page, verify the data directory location. You must
verify that this location points to the shared physical disk resource
assigned to this Exchange Server 2003 virtual server. Exchange Server
2003 will use the drive you select in this step for storing the
transaction log files, the default public store files, and the mailbox
store files (Pub1.edb, Pub1.stm, Priv1.edb, and Priv1.stm). Click
Finish.
|
8. | Right-click the Exchange Server 2003 virtual server, and then click Bring Online.
|
If
you are creating an active/active cluster, you must repeat these
exercises again on the second node, such as Server02. In an
active/passive configuration, you must repeat the processes on each
server node in the cluster that will be active. If you are creating a
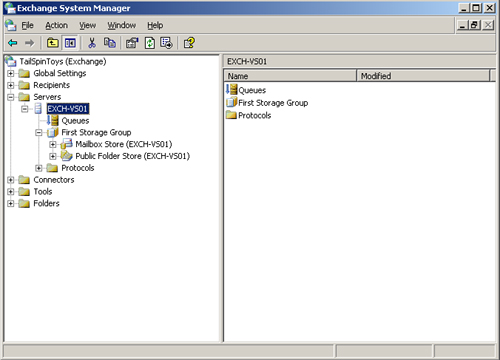
two-node active/passive Exchange Server 2003 cluster, you are done. If
you start Exchange System Manager and expand the Servers container, you
will see the new Exchange Server 2003 virtual server, Exch-VS01, as
shown in Figure 7.